It's More Than Just a Hole
We’ve all been there. You’re on a job site, the pressure is on, and you’re faced with a concrete wall that seems to mock you with its sheer toughness. It’s in these moments that you realize drilling into concrete is more than just a task—it’s a craft. It’s a blend of science, skill, and a deep respect for the materials and tools you’re working with. Anyone can blast a messy hole in a wall, but a true professional leaves a clean, precise opening, exactly where it needs to be, without compromising the structural integrity of the concrete around it. This guide isn’t just a set of instructions; it’s a collection of hard-won knowledge from our years in the field. We want to share our passion for the craft and help you drill with the confidence and precision of a seasoned pro.
Reading the Concrete: Know What You're Up Against
Before you even pick up a drill, take a moment to 'read' the concrete. It’ll tell you a story. Is it an older, pre-war building with softer, almost crumbly concrete? Or are you dealing with a modern, high-rise commercial structure with that slick, dense, high-strength mix? The difference is night and day, and it dictates your entire approach. For that standard, general-purpose C20-C30 concrete you find in most residential jobs, a good SDS-Plus bit will feel right at home. You’ll feel a steady, satisfying bite as you drill.
But step up to high-strength C40-C60 concrete, and you're in a different league. That stuff is unforgiving. Bring an underpowered tool to this fight, and you'll burn through bits and make little headway. This is where the SDS-Max system earns its keep. You need the extra power and the beefier carbide tips to make a dent. And then there's the wild card: reinforced concrete. You can be drilling smoothly and then thwack—you’ve hit rebar. Pushing harder is the worst thing you can do. You risk snapping your bit, damaging the structure, and getting nowhere. A good metal detector is your best friend here. Map out the rebar before you start, and if you can't avoid it, make sure you have the right kind of rebar-cutting drill bit designed for the job.
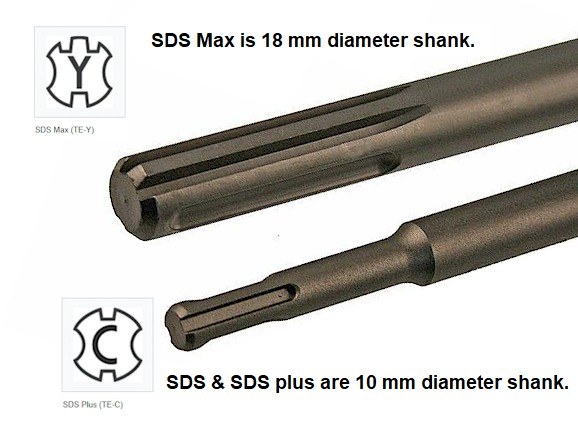
Choosing Your Weapon: The Right Tool for the Job
Walking onto a site with the right tools isn't just about looking professional; it's about making your life easier and ensuring a quality outcome. Your rotary hammer and bits are an extension of your own skill. For the everyday stuff—anchor bolts, small-diameter conduits, say up to 1/2" or 12mm—your trusty SDS-Plus is your go-to. It's light, it's agile, and it gives you a great feel for the work. It’s perfect for when you need precision and control.
But when the job calls for bigger holes, for running pipe, setting large anchors, or creating openings for rebar dowels, that's when you call in the cavalry: the SDS-Max. Using an SDS-Plus for a job that needs an SDS-Max is like trying to chop down a redwood with a hatchet. You might get there eventually, but you'll be exhausted, your tool will be screaming, and the result won't be pretty. An SDS-Max hammer doesn't just drill; it pulverizes. It has the raw power (we're talking 1200W and up) and the robust bit design to tackle the toughest concrete without breaking a sweat. Don't be afraid to go big when you need to.
The Art of the Drill: A Step-by-Step Guide
Alright, you've assessed the concrete and you've got your tools. Now for the main event. First, mark your spot. Don't eyeball it. A precise mark is the foundation of a precise hole. Before you start, give it a little tap with a center punch or even a concrete nail to create a small pilot dimple. This tiny step prevents the bit from 'walking' when you start drilling, ensuring your hole is exactly where you want it.
Start slow. Feather the trigger to get the bit spinning at a low RPM. Once it bites and you’ve established your path, you can squeeze for more power. Let the tool do the work. Your job is to guide it and apply steady, consistent pressure. Don't lean on it with all your body weight; you'll choke the motor and overheat the bit. The hammer action is what breaks up the concrete, not brute force.
Here’s a pro tip: listen to your drill. The sound will change when the flutes get clogged with dust. That's your cue to pull the bit out—while it's still spinning—to clear the debris. We call this 'pecking'. It keeps the hole clean, reduces friction, and prevents the bit from getting jammed. Drill, peck, drill, peck. It’s a rhythm. Once you reach your desired depth, don't just yank the bit out. Slow down and withdraw it smoothly to leave a clean hole.
Respect the Job: Safety is Not an Option
We’ve all seen the old-timer on site who scoffs at safety gear. Don't be that guy. I can't tell you how many times a good pair of safety glasses has saved me from a trip to the emergency room. A tiny shard of concrete flying at high velocity can do serious damage. Same goes for your lungs. Concrete dust, especially with silica, is no joke. A quality dust mask isn't just a comfort thing; it's a long-term health investment.
And it's not just about what you wear. It's about how you work. Make sure your footing is stable. Check your power cords for any frays or damage before you plug in. If you're working in damp conditions, be extra vigilant. And keep your work area tidy. A clean site is a safe site. This isn't about bureaucracy; it's about respecting the power of the tools you use and ensuring you go home in one piece at the end of the day.
Out of a Jam: What to Do When Things Go Wrong
Even the best of us run into trouble. It's how you handle it that counts. The most common headache? A jammed bit. You'll feel it instantly—the drill stops rotating but the hammer is still firing. Your first instinct is to force it, but don't. You'll only wedge it in tighter. Stop, switch your drill to reverse (if it has it) and try to back it out gently. If that doesn't work, you may need to carefully chip away some of the concrete around the bit with a small chisel to free it up. The best defense is a good offense: keep the hole clean with regular pecking, and you'll dramatically reduce the chances of getting stuck.
Another common issue is a crooked hole. This almost always happens right at the start. If you don't create that pilot dimple and you start with too much speed, the bit will wander. If you notice it's going off-course, stop. It's better to restart and drill a new, correct hole next to the mistake (if possible) than to try and force a crooked hole to go straight. It won't.
Love Your Tools: The End-of-Day Ritual
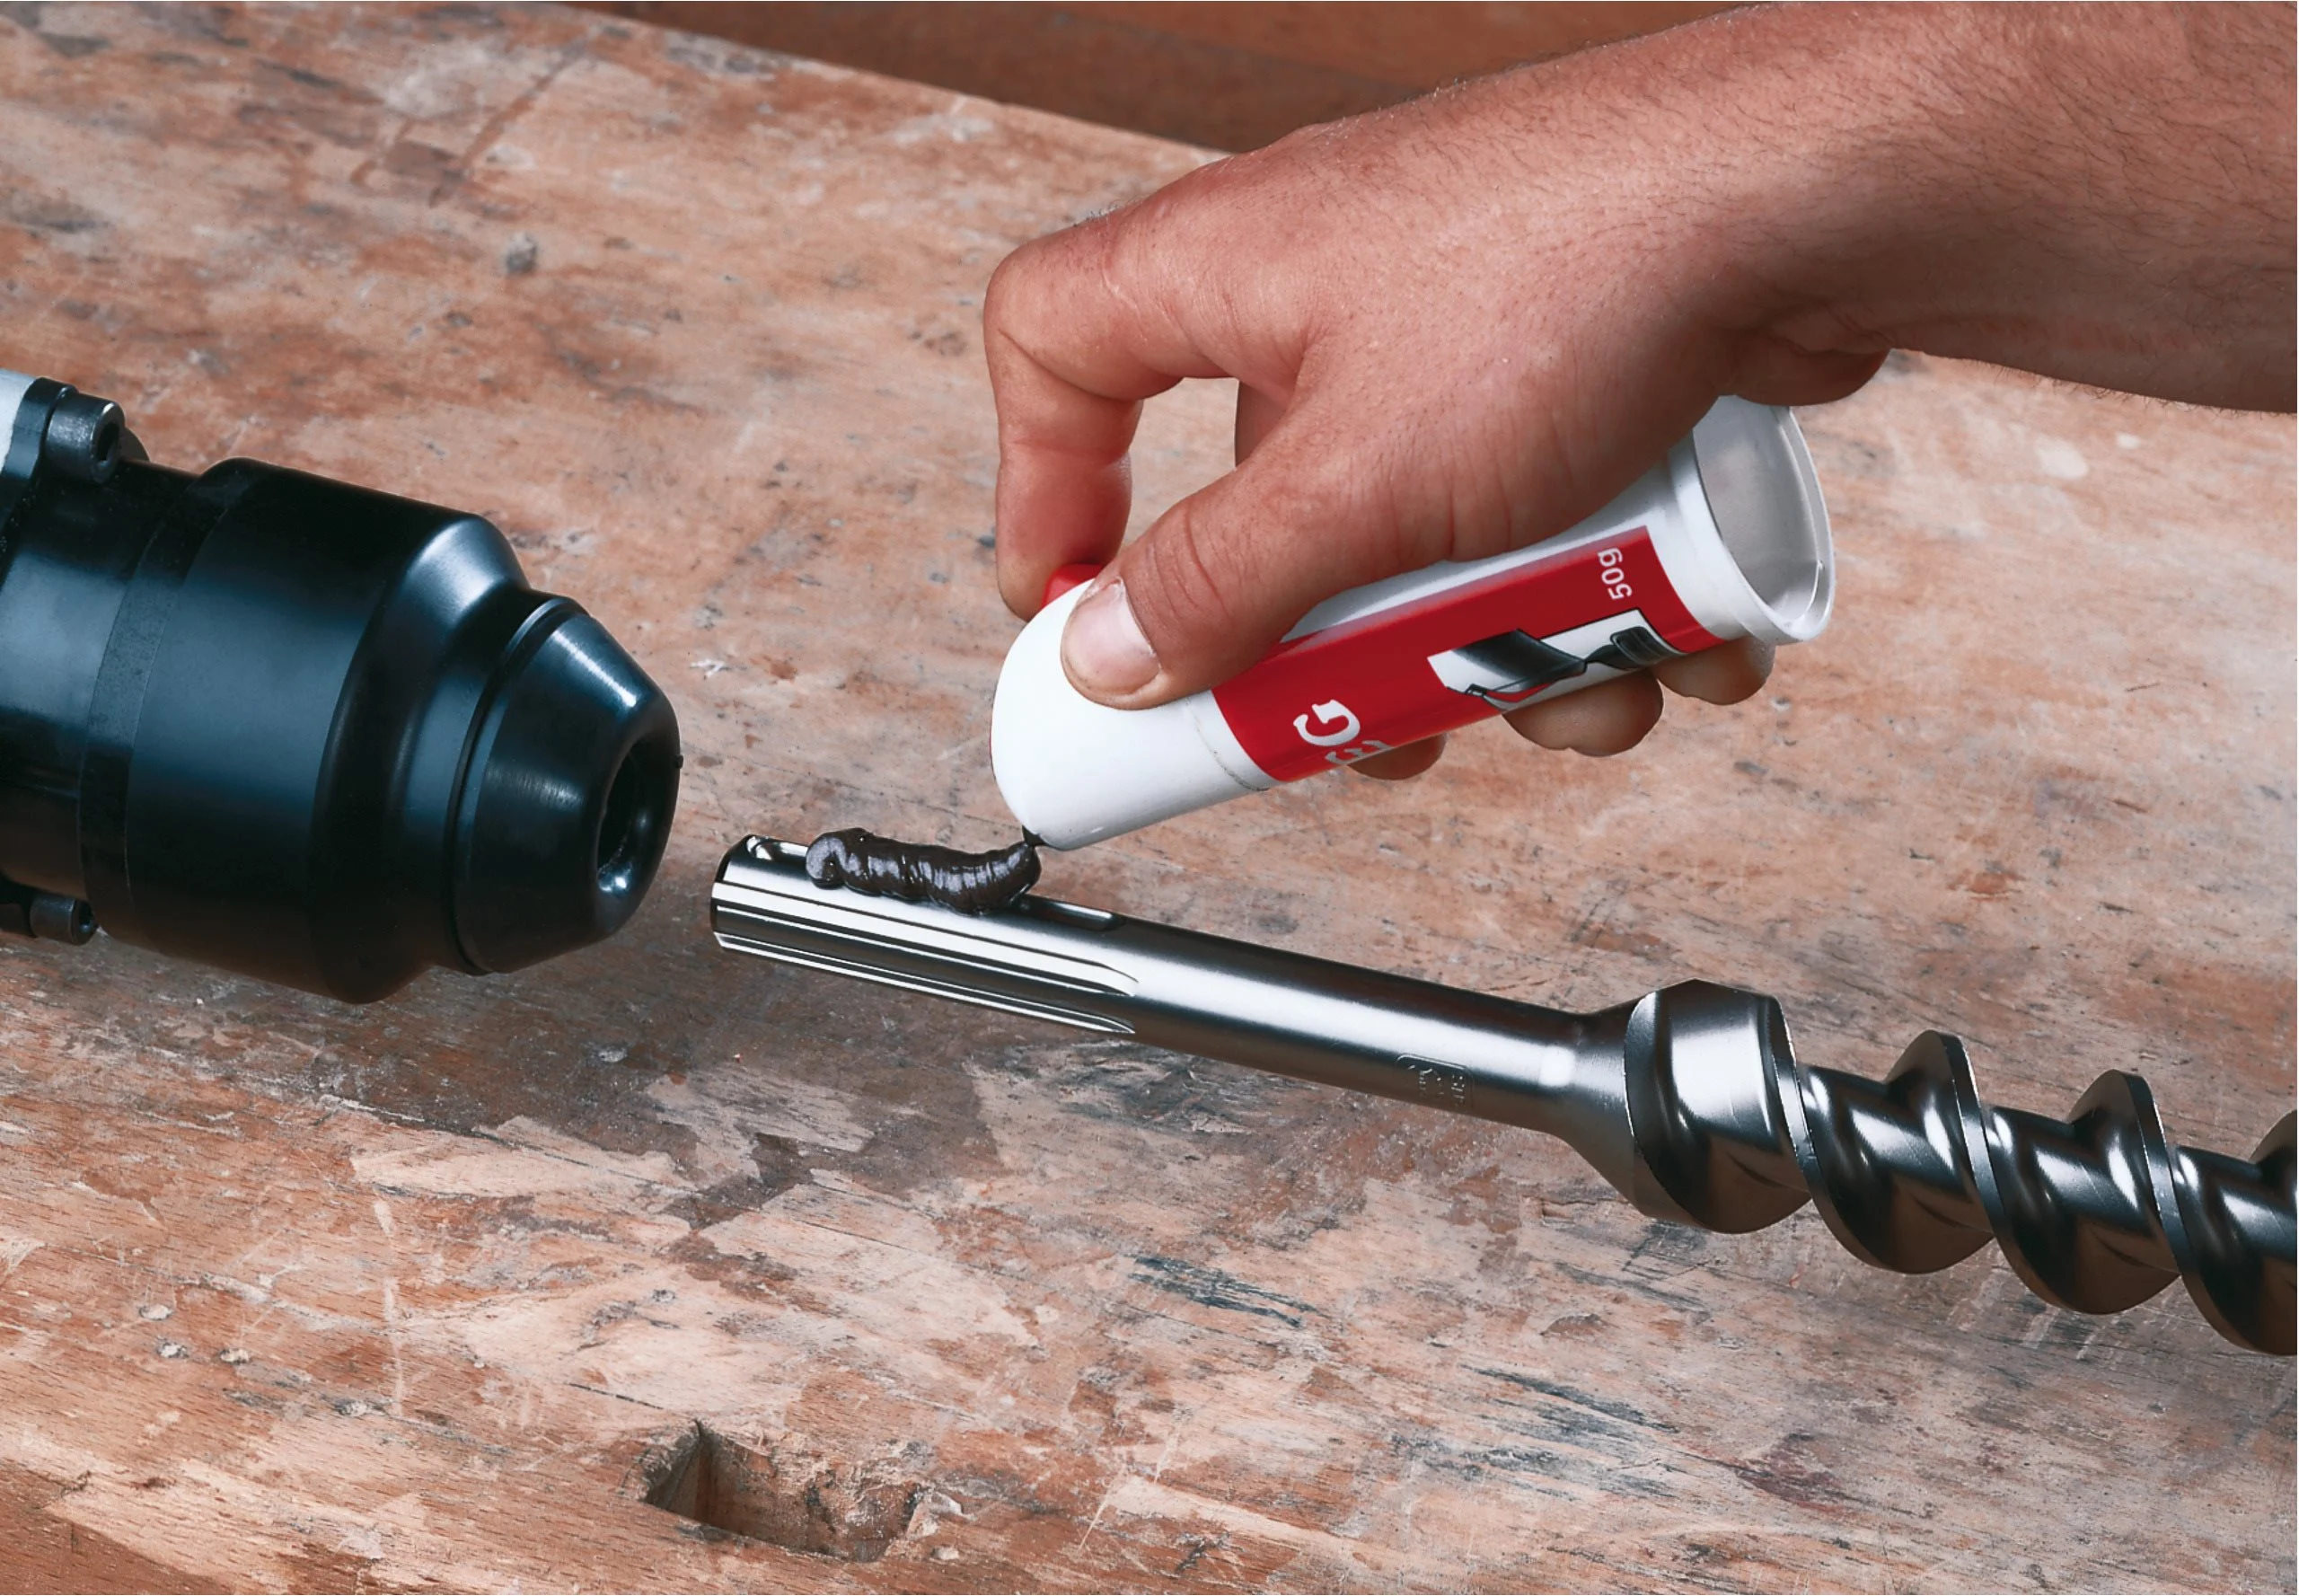
Your tools are your partners in this craft. They're also a significant investment. Taking care of them isn't a chore; it's just smart business. At the end of every day, take five minutes to wipe down your rotary hammer and your bits. Clean out the dust from the vents. A blast of compressed air works wonders. Give the shank of your bits a light coat of grease before storing them. It prevents rust and keeps the SDS mechanism working smoothly.
Pay attention to your bits. If you see the carbide tip is chipped or worn down, retire it. A dull bit doesn't just drill poorly; it puts a huge strain on your rotary hammer, leading to premature wear and tear on your expensive equipment. Store them properly so they aren't banging against each other. Treat your tools with respect, and a.