Common Causes of Drill Bit Overheating
Overheating is the #1 killer of drill bits. Understanding the causes helps you prevent premature wear and extend bit life significantly.
1. Excessive Speed (RPM)
- Too high RPM creates friction faster than heat can dissipate
- Larger diameter bits need slower speeds
- Hard materials require lower speeds than soft materials
- Rule: When in doubt, go slower
2. Too Much Pressure
- Forcing the bit generates friction instead of cutting
- Let the bit do the work—moderate, consistent pressure
- Excessive pressure also causes bit deflection and wandering
3. Dull or Damaged Cutting Edges
- Dull bits rub instead of cut, creating extreme friction
- Chipped edges create uneven cutting and localized heat
- A dull bit requires 3-4x more force, generating proportionally more heat
4. Chip Evacuation Problems
- Clogged flutes trap hot chips against the bit
- Chips re-cutting increases friction dramatically
- Deep holes without peck drilling cause severe clogging
5. Wrong Bit for the Material
- Using HSS on hardened steel without cooling
- Standard bits on abrasive materials like fiberglass
- Masonry bits on metal or vice versa
Prevention Strategies
Speed and Feed Optimization
| Material | Recommended Speed | Pressure |
|---|---|---|
| Softwood | High (2000-3000 RPM) | Light |
| Hardwood | Medium (1000-2000 RPM) | Moderate |
| Aluminum | High (2000-3000 RPM) | Light, use lubricant |
| Mild Steel | Low-Medium (500-1000 RPM) | Moderate |
| Stainless Steel | Low (300-500 RPM) | Firm, constant |
| Concrete (hammer) | Per tool spec | Let hammer work |
Peck Drilling Technique
For deep holes, use the peck drilling method:
- Drill 1-2 bit diameters deep
- Fully retract to clear chips
- Return and continue
- Repeat until target depth
This clears chips, allows cooling, and prevents jamming.
Regular Bit Inspection
- Check cutting edges before each use
- Replace or sharpen at first sign of dullness
- Look for chips, cracks, or discoloration
- Rotate stock to spread wear across multiple bits
Cooling Methods by Material
Metal Drilling
- Cutting oil: Best for steel, provides lubrication + cooling
- Water-soluble coolant: Good for aluminum, high cooling capacity
- WD-40: Light-duty, good for occasional use
- Automatic mist system: For production environments
Concrete/Masonry Drilling
- Dry drilling with breaks: Standard method, retract every few seconds
- Wet drilling: Only with specialized wet-drill systems
- Never use water with standard hammer drills—damages the tool
Wood Drilling
- Generally no cooling needed at proper speeds
- Clear chips frequently in deep holes
- Reduce speed if you see smoke or smell burning
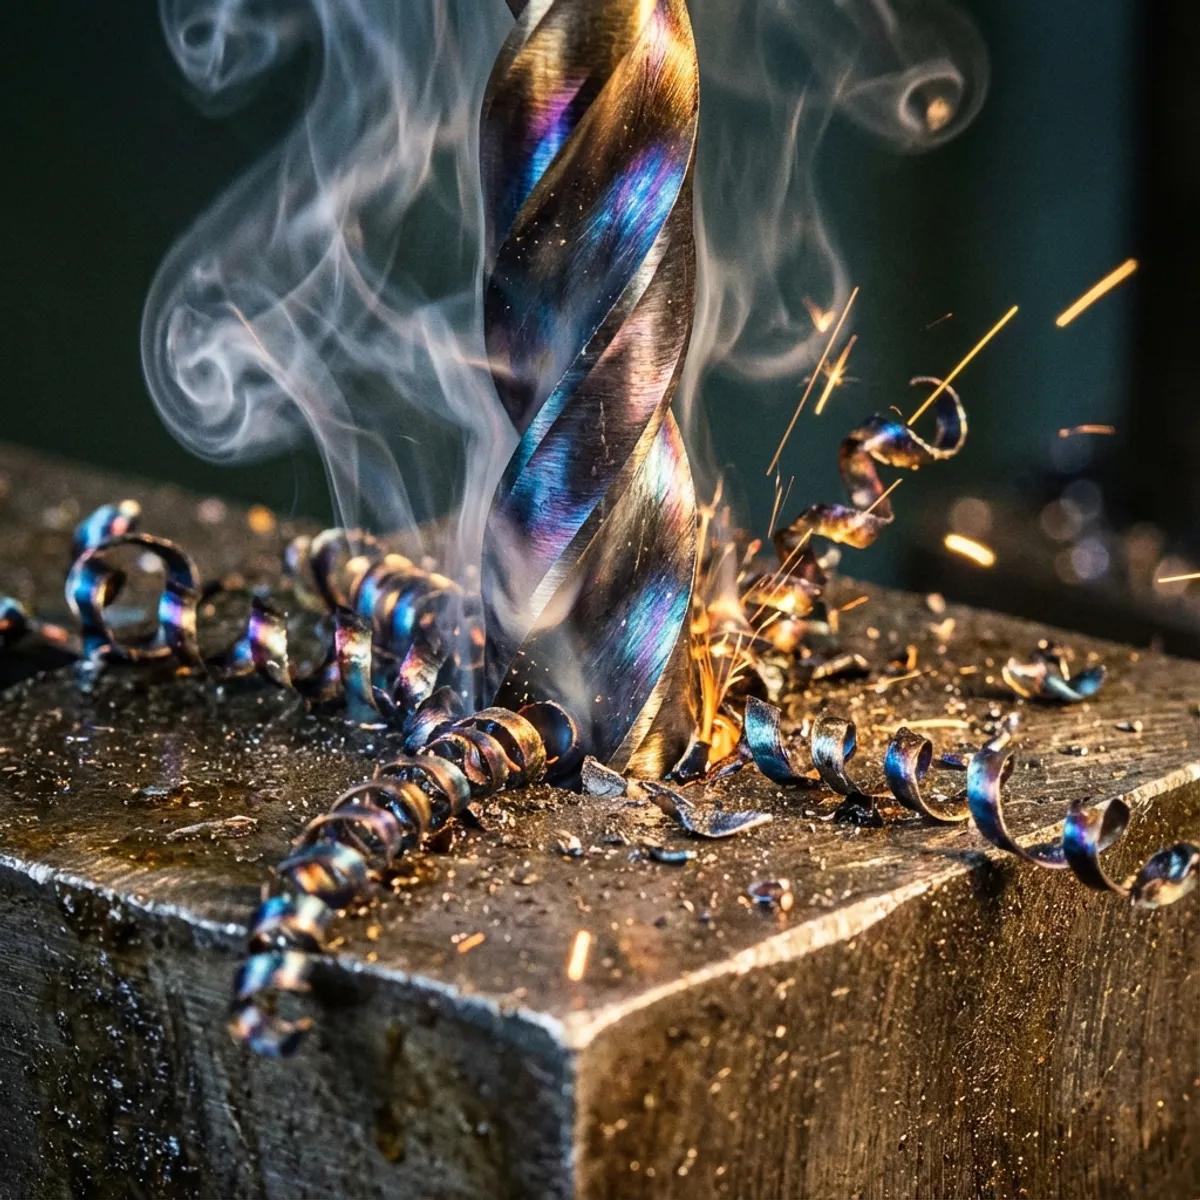
Signs of Heat Damage
Visual Indicators
- Blue/purple discoloration: Bit exceeded 300°C—tempering affected
- Brown/bronze color: Moderate overheating, reduced life
- Black oxide worn off: Coating failure, steel exposed
- Rounded cutting edges: Heat softened then wore the edge
Performance Indicators
- Drilling slower than before
- Requiring more pressure
- Wandering or walking on surface
- Rough hole finish
- Squealing or burning smell
When to Replace vs. Resharpen
- Replace if: Blue discoloration, visible cracks, bent shank
- Resharpen if: Dull but no color change, minor edge wear
- Pro tip: Heat-damaged bits can be resharpened but will dull faster