

The useful question after a failed pull-out test is not only which anchor failed. It is what kind of hole the anchor was forced to work in. A wedge anchor, sleeve anchor, drop-in anchor, concrete screw, or chemical stud is tested by its manufacturer in a controlled hole: diameter, depth, cleanliness, substrate, edge distance, and installation torque are all inside a defined window. On site, the drill bit and the operator create most of that window.
This guide is written for fastening brands, anchor distributors, contractors, and SDS bit buyers who need to diagnose failures without jumping immediately to a new anchor brand. It maps the visible failure pattern back to the drilling variable that should be checked first.
Read the Hole Before Blaming the Anchor
Pull-out capacity starts before the anchor is installed. Expansion anchors need radial pressure against sound concrete. Chemical anchors need resin bonded to clean mineral surface. Concrete screws need threads cutting into a pilot hole that is neither polished smooth nor oversized. If the hole is wrong, the anchor has already lost capacity before the test rig applies load.
A good investigation separates three layers: the anchor specification, the concrete condition, and the drilled-hole quality. The third layer is where SDS bit quality becomes visible: carbide wear, head symmetry, runout, flute evacuation, and rebar impact all change the hole even when the nominal bit size is printed correctly on the shank.

Failure Mode Map
| What the pull-out test shows | Likely meaning | Drilling variable to check first |
|---|---|---|
| Anchor pulls out with little concrete cone | Expansion grip or adhesive bond did not develop | Oversized hole, dust film, wet hole, wrong bit diameter |
| Anchor spins during torque setting | Hole mouth is too large or bell-mouthed | Worn carbide head, tilted start, hammer chuck runout |
| Large concrete cone breakout | Concrete, edge distance, spacing, or embedment controls the failure | Actual embedment, edge distance, cracked concrete zone |
| Chemical stud comes out with resin sleeve | Resin bonded to dust or did not wet the wall | Blow-brush-blow sequence, brush size, cure time, hole dryness |
| High scatter across identical anchors | Installation process is inconsistent | Bit condition, drilling angle, depth control, rebar contact, cleaning discipline |
| Anchor steel fractures | Steel reached capacity before concrete or bond failed | Hole may be acceptable; review anchor grade and design load |
Diameter and Roundness
The diameter printed on the bit is not the same as the diameter produced in concrete after 200 holes, several rebar hits, and a worn SDS chuck. For expansion anchors, oversize reduces radial pressure. For concrete screws, oversize removes thread bite. For chemical anchors, a controlled annular gap is expected, but an oval hole creates uneven resin thickness and a weak side.
Measure the bit head with calipers, not only the steel body. Inspect the entry mouth and the first 20 mm of the hole for bell-mouth wear. If the top of the hole is wider than the bottom, the anchor may feel normal during insertion but fail when loaded. For high-value anchor jobs, distributors should ask for hole-diameter wear data from sample testing, not just carbide hardness claims.
Dust Cleaning and Embedment
Dust is a mechanical separator. In chemical anchors it prevents resin from bonding to concrete. In expansion anchors and concrete screws it can sit at the bottom of the hole and stop the anchor before full embedment. A hole that looks empty can still have dust film on the side wall.
Unless the anchor data sheet says otherwise, drill deeper than effective embedment by a small dust allowance, then follow the specified blow-brush-blow or vacuum-brush-vacuum sequence. The brush must match the hole diameter. A brush that is too small only moves air through the hole; it does not scrape the wall.
For diameter and depth references, use the anchor bolt drill size chart. For application-side product planning, see SDS-Plus drill bits for anchor bolt installation.
Rebar Deflection and Hard Aggregate
Rebar can ruin a hole even when the bit survives. The head may glance off the bar, chip one edge, heat up, or cut an oval path before returning to concrete. The pull-out test does not know why the hole is oval; it only sees reduced contact pressure or inconsistent resin thickness.
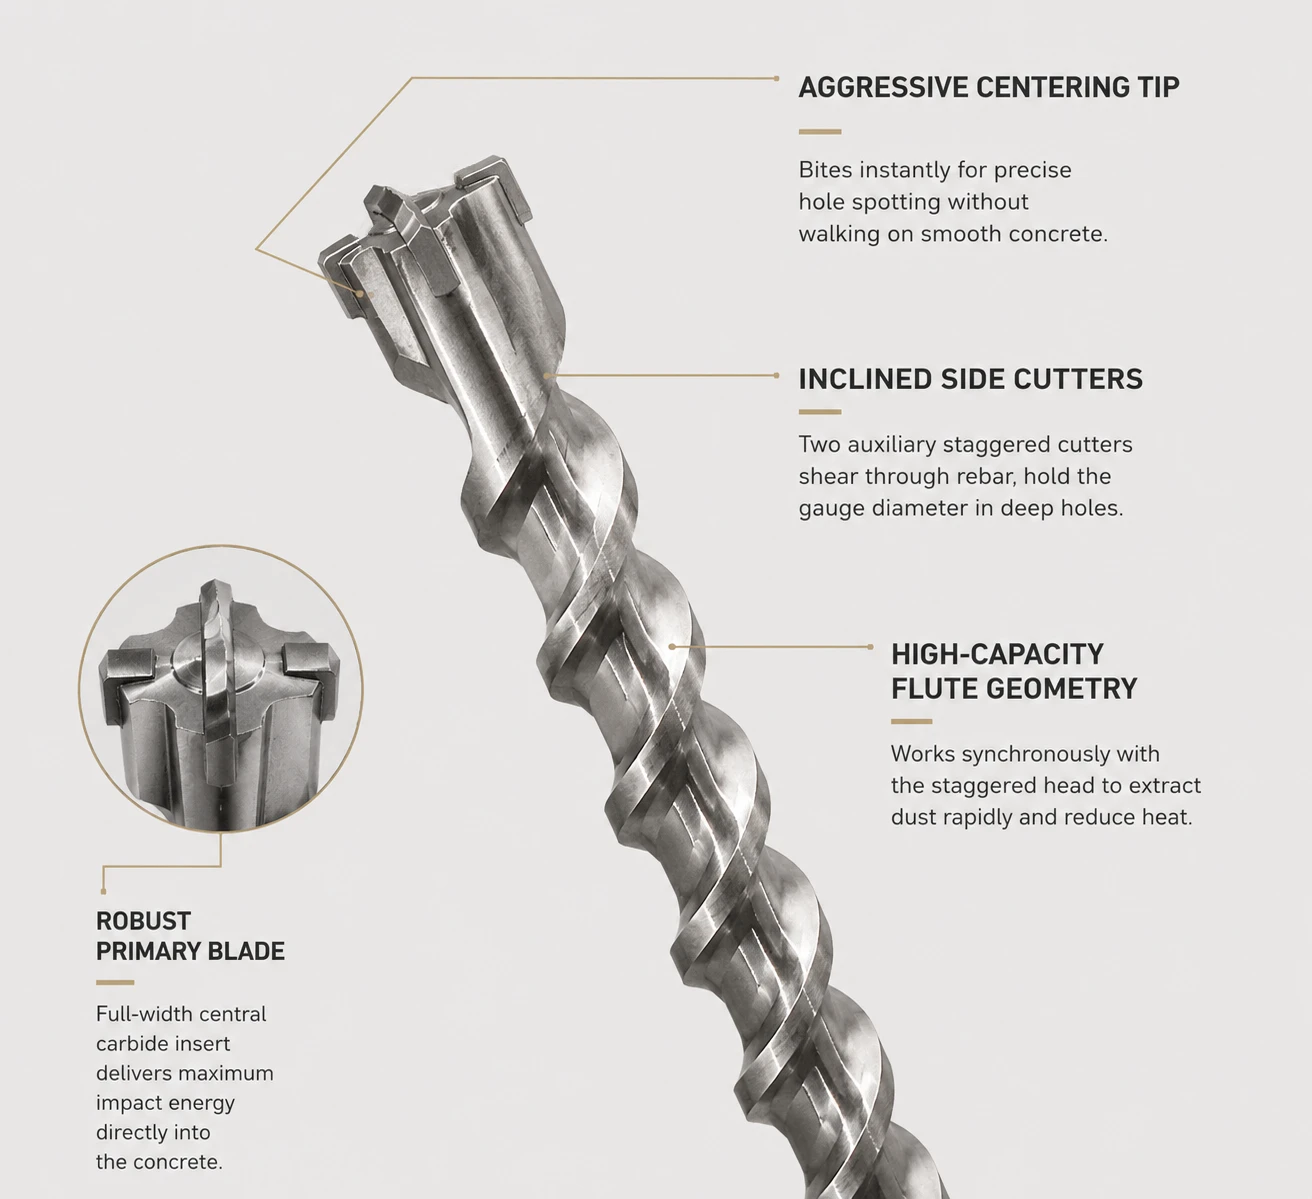
Do not cut structural steel unless the project specification allows it. If the anchor position can move, relocate after detecting rebar. If the position is fixed and rebar risk is normal for the job, choose a bit geometry that distributes impact: 4-cutter SDS-Plus for anchor-grade holes, or SDS-Max multi-segment / full-carbide-head designs for larger and deeper reinforced-concrete holes.

SDS Bit Selection by Anchor Risk
| Anchor work | Recommended Zhonghuan range | Reason |
|---|---|---|
| Plain concrete, light fixing, M6-M12 anchors | SDS-Plus Standard 2-cutter, YG8C, self-centering tip | Fast start, low vibration, clean holes when rebar is not expected |
| Professional anchor holes in reinforced concrete, M8-M20 | SDS-Plus Professional 4-cutter full-carbide head, YG11C option | Rounder holes and better gauge retention after aggregate or light rebar contact |
| Large or deep structural anchors | SDS-Max ZHMAX-7 multi-segment | Higher impact class and staged cutting edges for deep reinforced concrete |
| Hard concrete with repeated rebar strikes up to the full-head range | SDS-Max ZHMAX-8 full-carbide head | One-piece carbide head, resistance-friction-welded to the body, no side brazed tips to shear |
| Deep calibrated holes in abrasive concrete or rock-like aggregate | ZHMAX-168 3-plate / 6-edge SDS-Max | Six impact faces help produce straighter holes with lower vibration |
Inspection Records for Distributors
If you sell drill bits into anchor channels, the useful quality record is not only a nice product photo. Ask for bit-head diameter at start and after a defined hole count, runout in a reference chuck, carbide grade, brazing or welding method, shank gauge check, and sample holes measured in representative concrete. That record is what connects the drill bit to anchor pull-out reliability.
A failed pull-out report should also record anchor type, nominal anchor size, specified drill diameter, measured bit-head diameter, hole depth, actual embedment, cleaning method, concrete strength, distance to edge, spacing to adjacent anchors, whether rebar was hit, installation torque, chemical cure time, and photos of the failed hole.
RFQ Checklist
For an anchor-drilling RFQ, send the anchor schedule, common diameters, embedment depths, concrete strength class, rebar probability, expected holes per day, rotary hammer class, preferred shank, packaging format, and whether the channel needs retail packs, contractor kits, or bulk cartons.
Zhonghuan can map those variables to SDS-Plus and SDS-Max families: 2-cutter self-centering bits, 4-cutter full-carbide-head bits, ZHMAX-7, ZHMAX-8, and ZHMAX-168. Contact our engineering team with pull-out failure photos or an anchor schedule and we will recommend the drilling specification before the next test run.


